Rush SR Service Manual
  • Getting Started
    • Rush SR Specs
      • Why the GSXS-1000?
      • Dyno Sheet
    • Before Starting - Warnings
    • Removing Bodywork
    • Break-in and Initial Setup
      • Seat Mounting
      • Pedal Box Placement
      • Bedding Brakes
      • Engine Break-in
      • Driving and Shifting
    • Understanding Your Dash
  • Maintenance
    • Maintenance Schedule
      • Each Session
        • Torquing Wheels
        • Lubing Chain
      • Each Weekend
        • Checking Fuel Pressure
        • Clean & Adjusting Chain
        • Inspecting Nuts & Bolts
        • Checking Shock Pressure
        • Adjusting Throttle & Clutch Cable
      • Each Month/Quarter
        • Greasing Joints and Bearings
        • Changing Diff & Engine Oil
        • Inspecting & Bleeding Brakes
      • Each Year
        • Change Air Filter
        • Changing Coolant
        • Cleaning Fuel Filter
        • Inspecting Wheel Bearings
        • Rebuilding Shocks (Track Variable)
        • Cleaning Radiator
        • Replacing Chain (Track Variable)
        • Rebuilding Axles
      • Long-Term Maintenance (150hr+)
    • Fluids
    • Shock Diagrams
    • Torque Specs
    • Suzuki Service Manuals
    • Electronics and Wiring
      • Main Harness
      • Shift Harness
      • Dash Harness
    • Winterizing
    • Dash Alarms
    • Engine and Gearbox
  • Tunables
    • Factory Baseline Setup Guide
    • Anti-Roll Bars
    • Shock Adjustments
    • Gear Ratios / Sprocket Changes
    • Alignment and Ride Height
    • Diff Plate Stacks
    • Ballast
    • Chain Guards and Replacement
    • Left Foot Braking
    • Brake Pads and Rotors
    • Tires
    • Mirrors
  • Dash, Data, and SmartyCam
  • Wrapping Your Rush SR
  • Running & Consumables Costs
    • Comparison to Other Cars
  • Parts & Repair Costs
  • Transporting Your Rush SR
  • Competing in Events
    • Decals and Brand Assets
    • Technical Regulations
  • Getting Help
    • Rush SR Owners' Forum
    • Rush SR Facebook Community
  • Service Bulletins
    • 2023-05-19 Pedal Box Safety Notice
Powered by GitBook
On this page

Was this helpful?

Edit on GitHub
  1. Service Bulletins

2023-05-19 Pedal Box Safety Notice

PreviousService Bulletins

Last updated 1 year ago

Was this helpful?

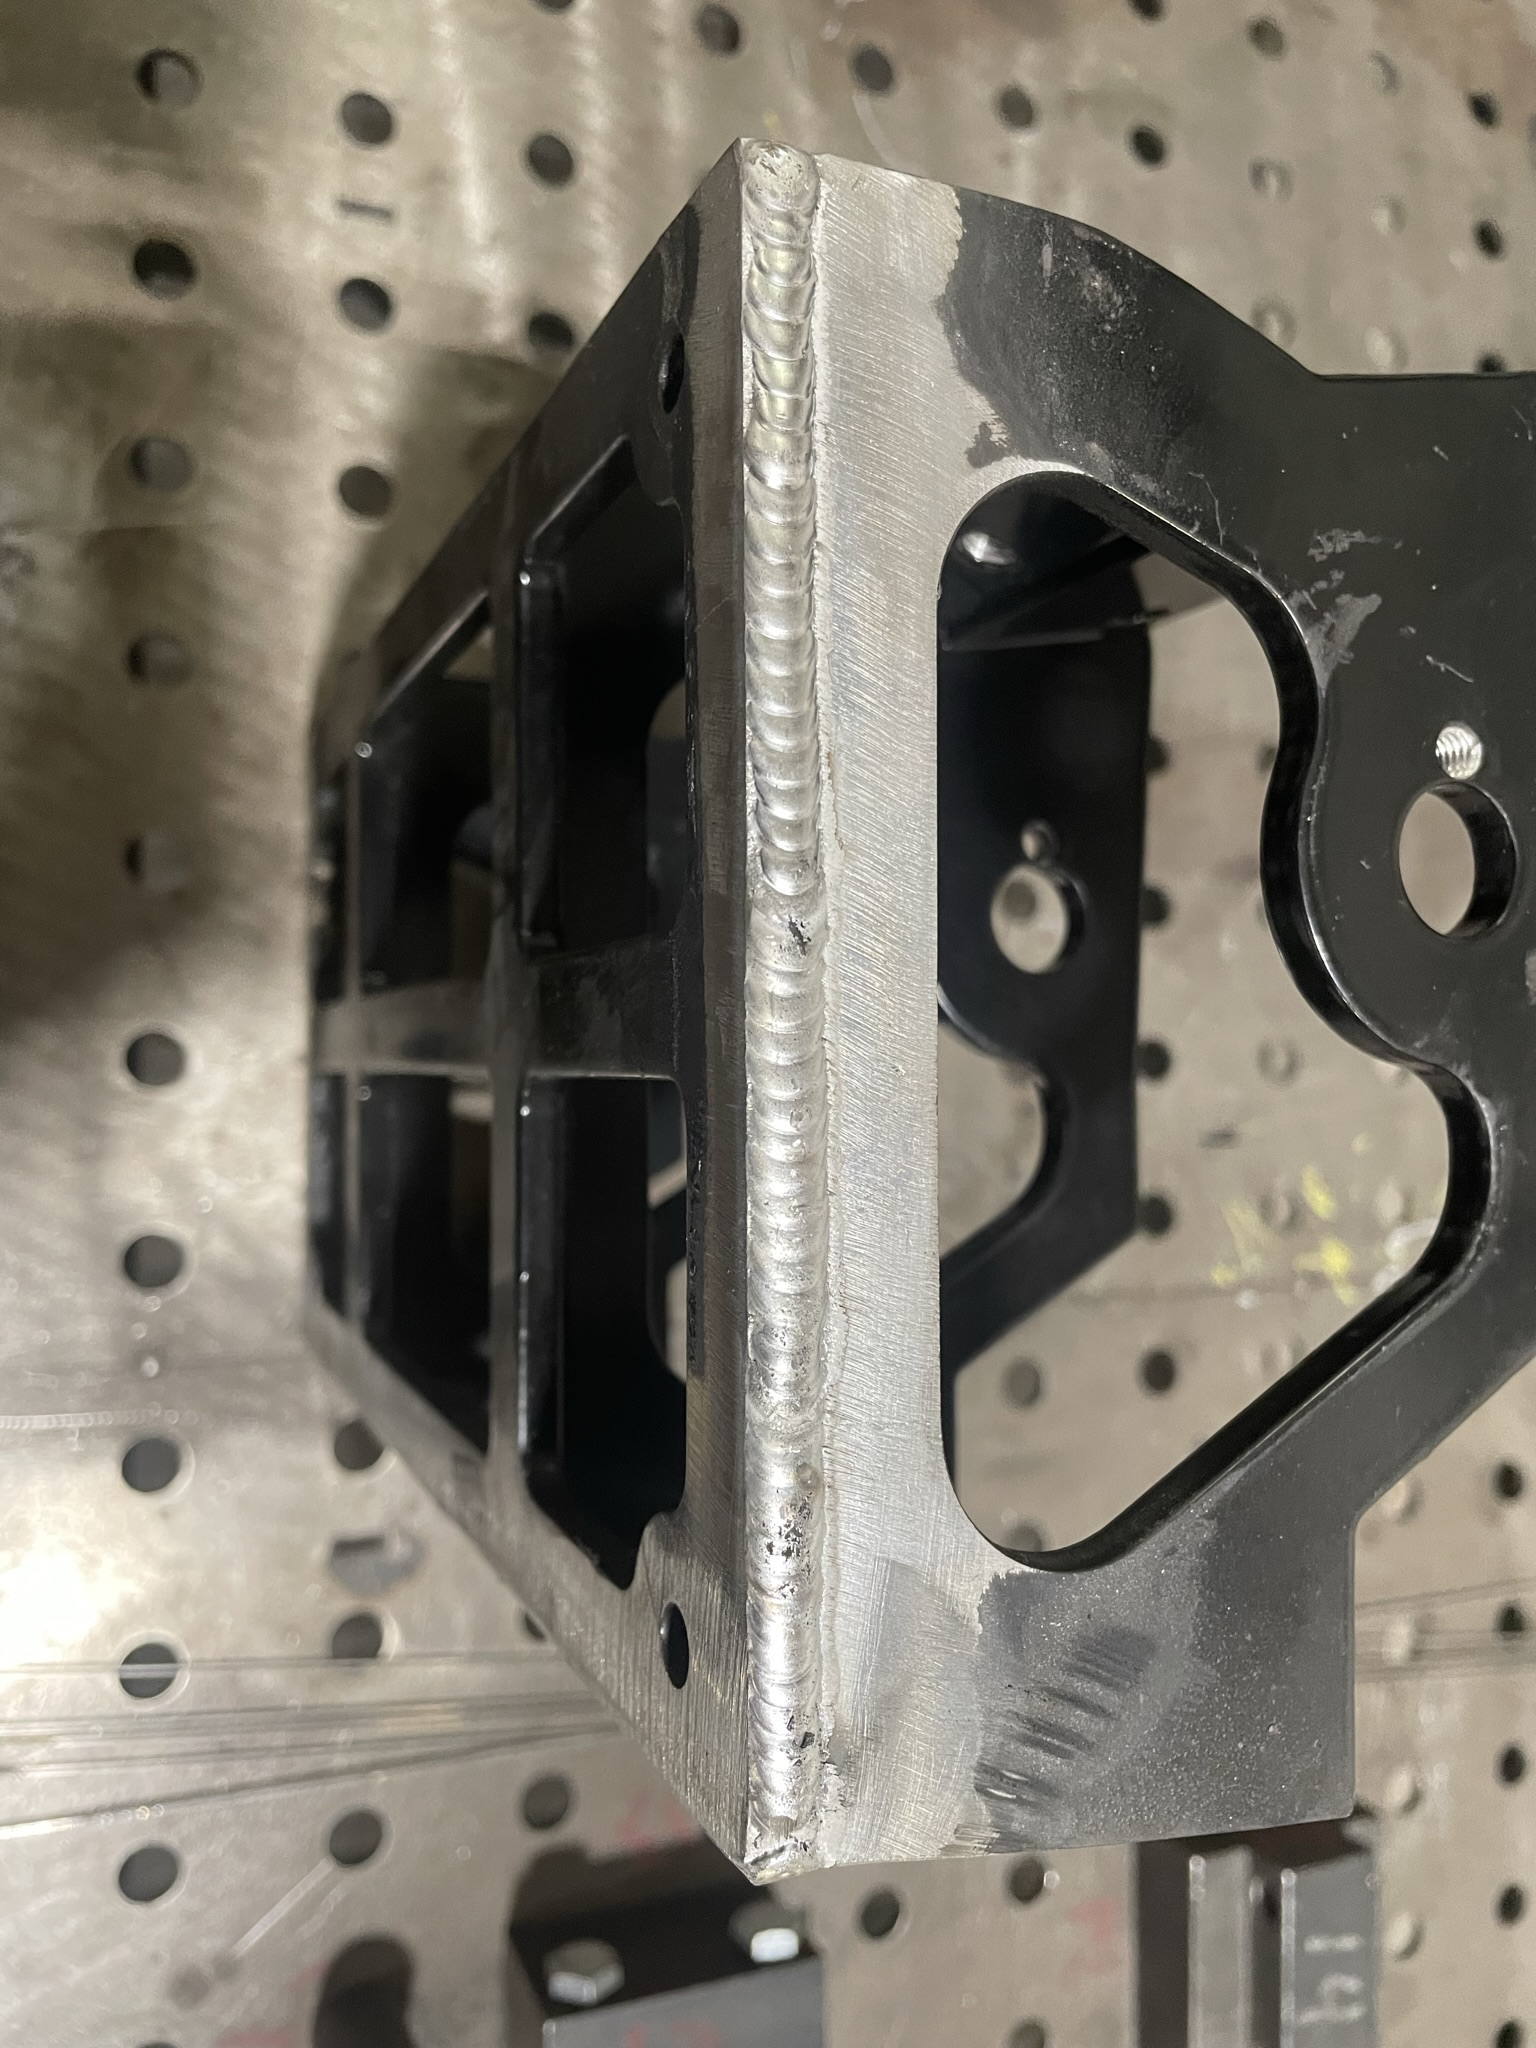
These pictures show the completed repair. The repair can be performed in a few different ways. 1) Least amount of work, The weld repair can actually be done in the car without completely removing it or dismantling it. The 4 bolts that mount it to the chassis must be removed. The break, clutch and throttle cables can be left in place. The paint is then ground off along the side and back seam. The side seams should be completely welded the back seam should be welded from the ends to the inner supports. The welds should be TIG welded as the frame is aluminum. This welding procedure is the same weather removing the box or not. Obviously this requires the car to be taken to a facility where the weld can be performed. This is less than 1hrs total for the repair. 2) Pedal box removal. Remove the pedal box as above, remove the barrel from the end of the throttle cable and clutch cable. Remove the master cylinders, leaving the brake lines connected which will eliminate the need to bleed the brakes afterward. With the pedal box removed it can be taken to a qualified welder where the welding should be performed as in 1 above. 3) Follow the instructions in 2 above, once the pedal box is removed from the car, box it up and send it to us. We will do the weld repair and send it back. 4) Lastly we are happy to send out a new pedal box frame to anyone who wishes it rather than the above options. This is however the most work as the pedal box will have to be completely disassembled and rebuilt.

This bulletin can also be found and on the .

on the owner's forum
Facebook group
179KB
2023-05-19 Rush SR Pedal Box Safety Notice.pdf
pdf