
Clutch Switch
The clutch switch tells the car the clutch is disengaged, so the starter will crank while the car is in gear. Without one, the starter interlock only cranks in neutral. After a spin or a stall that means paddling back to neutral before you can restart. With a switch fitted, you hold the clutch in and hit the starter in gear, which saves real time getting going again during a session.
Safety warning: A clutch switch (or a clutch-bypass momentary button) lets the starter crank with the car in gear. Only crank with the clutch fully disengaged. Being able to start the engine in gear with the clutch out is a genuine safety risk, so fit any bypass at your own risk.
Factory Fitment and History
Section titled “Factory Fitment and History”Gen2 (drive-by-wire) cars built after January 2025 come with a factory clutch switch that lets you start in gear with the clutch pressed. Earlier Gen2 cars, and all Gen1 (KLine) cars, left the factory without one, so owners who wanted to start in gear have wired their own. Under the 2026 technical regulations a clutch switch is now mandatory.
If your car has no clutch switch, the stock behavior is the one described under Understanding Your Dash: the engine must be in Neutral to start and will not crank in gear even with the clutch pedal depressed.
Where the Switch Is
Section titled “Where the Switch Is”Stand behind the car and look forward. The switch is on the left side from that view, to the left of the motor and further inboard than the differential. The clutch cable threads into it, which is the quickest way to pick it out.
Once you can see it, two things are worth checking before you reach for a meter: whether the cable is still seated in the switch, and whether the switch has shifted on its tube out of the position described under Wiring and Mounting the Switch. Neither needs tools.
Finding the Clutch Switch Wire
Section titled “Finding the Clutch Switch Wire”Gen2 (drive-by-wire)
Section titled “Gen2 (drive-by-wire)”Cars built after January 2025 already have the switch from the factory, so there’s nothing to wire. On earlier Gen2 cars, find the brown wire, either near the dash connector or at the ECU connector (ECU pin diagram T72).
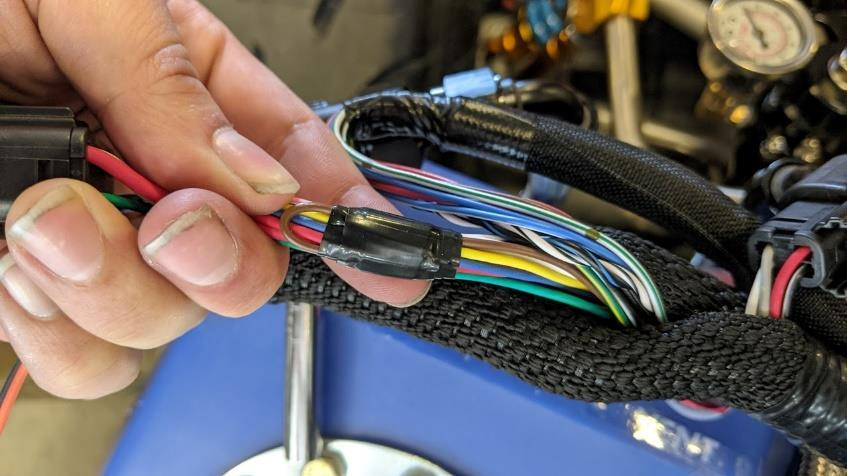
Gen2 (drive-by-wire): the brown clutch switch wire, near the dash connector or at the ECU connector (ECU pin diagram T72)
Gen1 (drive-by-cable / KLine)
Section titled “Gen1 (drive-by-cable / KLine)”On drive-by-cable cars, find the black-and-orange wire at the ECU connector (ECU pin diagram T40). It’s circled in red in the photo below.
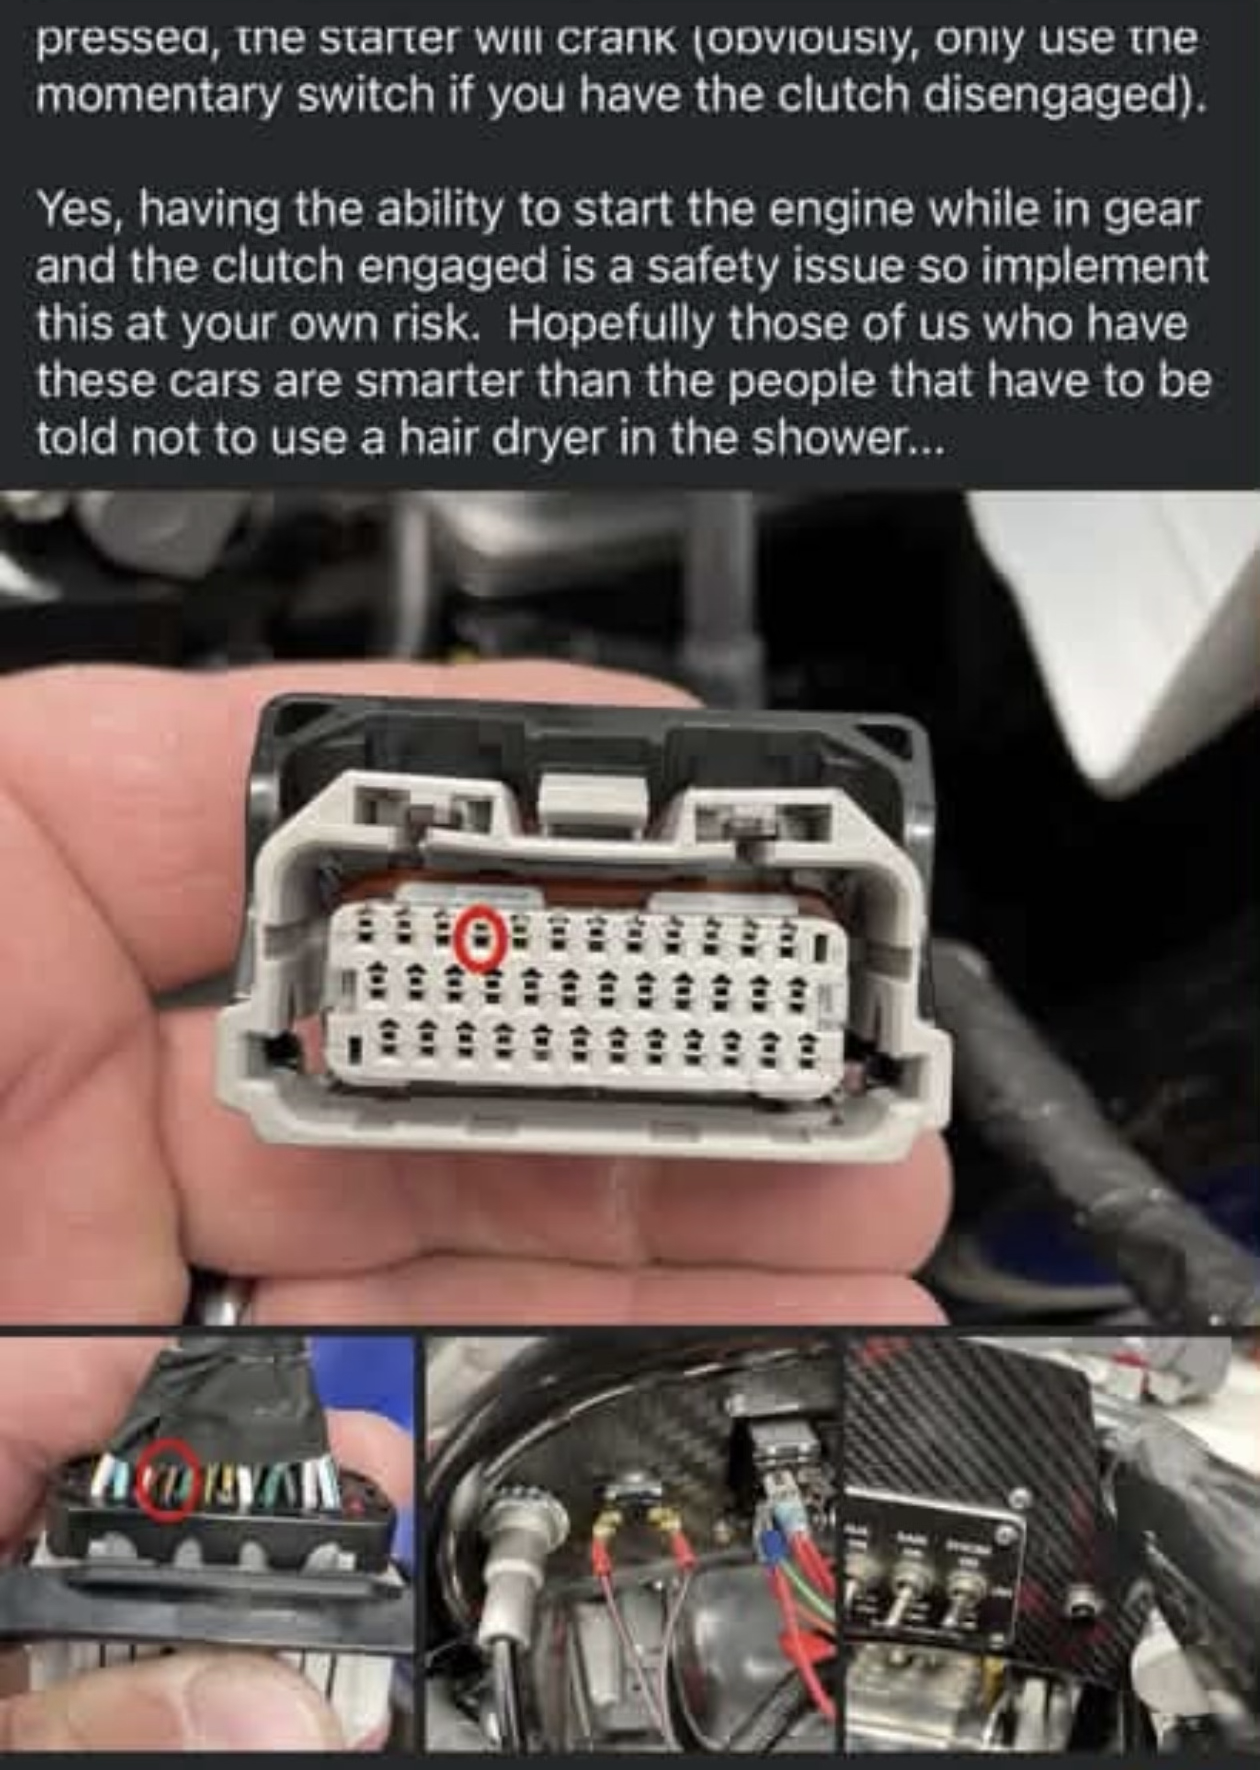
Gen1 (KLine): the black-and-orange clutch switch wire (circled) on the ECU connector, plus the bypass switch wiring and installed momentary switch
Wiring and Mounting the Switch
Section titled “Wiring and Mounting the Switch”Once you’ve found the clutch switch wire for your car, the rest of the install is the same for both generations. The steps below follow the official RAW clutch switch install guide, and the switch itself is the plug-in RAW Parts clutch switch kit.
- Splice the female 2-pin connector pigtail brown/tan wire to the clutch switch wire you found above.
- Splice the pigtail black wire to the black/white wire from the bike dash connector, or to another ground. A black/white wire or chassis ground both work.
- Mount the clutch switch and adjust its position on the tube. Set it so the spring wraps around the barrel in the clutch arm and sits nearly straight, with a little tension on the spring at rest.
- Check the action: the switch should be engaged when the clutch is pulled and disengaged when the clutch is idle.
- If you’re using the dash aux switch as the clutch switch, de-pin the MX150 male connector from the clutch switch and install the brown/black wires from the backup pigtails. Run the tan and black wire of the backup pigtail to the aux switch on the dash.
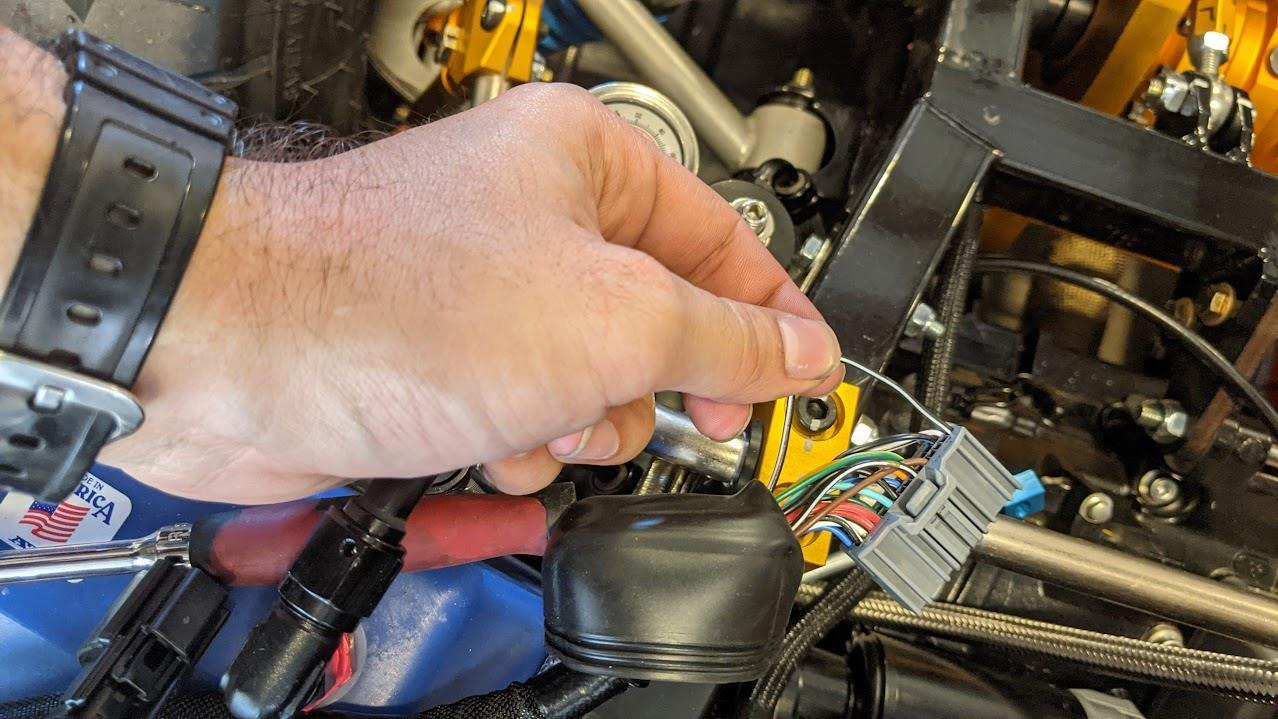
The switch mounted on the tube: spring wrapped around the barrel in the clutch arm, nearly straight with light tension at rest
Diagnosing a Faulty Clutch Switch
Section titled “Diagnosing a Faulty Clutch Switch”If a clutch switch is already fitted but misbehaving (limp mode, no blip on downshift, or a “Check Clutch Switch” dash alarm), see:
- Clutch Switch (Gen2 DBW) for diagnosing a failed or misadjusted switch
- Clutch Switch dash alarm for what the alarm means
Start at Where the Switch Is if you have not had eyes on the switch yet. A cable that has come out of the switch looks the same from the dash as a switch that has failed.