Rush SR Service Manual
  • Getting Started
    • Rush SR Specs
      • Why the GSXS-1000?
      • Dyno Sheet
    • Before Starting - Warnings
    • Removing Bodywork
    • Break-in and Initial Setup
      • Seat Mounting
      • Pedal Box Placement
      • Bedding Brakes
      • Engine Break-in
      • Driving and Shifting
    • Understanding Your Dash
  • Maintenance
    • Maintenance Schedule
      • Each Session
        • Torquing Wheels
        • Lubing Chain
      • Each Weekend
        • Checking Fuel Pressure
        • Clean & Adjusting Chain
        • Inspecting Nuts & Bolts
        • Checking Shock Pressure
        • Adjusting Throttle & Clutch Cable
      • Each Month/Quarter
        • Greasing Joints and Bearings
        • Changing Diff & Engine Oil
        • Inspecting & Bleeding Brakes
      • Each Year
        • Change Air Filter
        • Changing Coolant
        • Cleaning Fuel Filter
        • Inspecting Wheel Bearings
        • Rebuilding Shocks (Track Variable)
        • Cleaning Radiator
        • Replacing Chain (Track Variable)
        • Rebuilding Axles
      • Long-Term Maintenance (150hr+)
    • Fluids
    • Shock Diagrams
    • Torque Specs
    • Suzuki Service Manuals
    • Electronics and Wiring
      • Main Harness
      • Shift Harness
      • Dash Harness
    • Winterizing
    • Dash Alarms
    • Engine and Gearbox
  • Tunables
    • Factory Baseline Setup Guide
    • Anti-Roll Bars
    • Shock Adjustments
    • Gear Ratios / Sprocket Changes
    • Alignment and Ride Height
    • Diff Plate Stacks
    • Ballast
    • Chain Guards and Replacement
    • Left Foot Braking
    • Brake Pads and Rotors
    • Tires
    • Mirrors
  • Dash, Data, and SmartyCam
  • Wrapping Your Rush SR
  • Running & Consumables Costs
    • Comparison to Other Cars
  • Parts & Repair Costs
  • Transporting Your Rush SR
  • Competing in Events
    • Decals and Brand Assets
    • Technical Regulations
  • Getting Help
    • Rush SR Owners' Forum
    • Rush SR Facebook Community
  • Service Bulletins
    • 2023-05-19 Pedal Box Safety Notice
Powered by GitBook
On this page

Was this helpful?

Edit on GitHub
  1. Tunables

Shock Adjustments

PreviousAnti-Roll BarsNextGear Ratios / Sprocket Changes

Last updated 1 year ago

Was this helpful?

First of all, shocks should . Check them before each track day and each race session.

When adjusting preload and ride height, are needed.

See the for a full exploded diagram of the shock.

Adjusting Compression and Rebound

Adjustment is best made using a small Allen key in the adjuster holes.

From closed, the compression adjuster (bottom, see picture) has 3.5 turns to fully open.

The rebound adjuster (top) has 4.5 from its fully closed position.

To close, turn to the right. To open, turn to the left. Closed is up, open is down.

The thread pitches are different. If you start with both the compression and rebound closed and open them together by opening the compression adjuster (turn them left), both will be fully open at 3.5 turns of the compression adjuster.

When closing both to the fully closed position, it is best to start by closing both together until you feel a valve bottom out. DO NOT force the adjusters at this point as excessive force can dislodge the press-fit valve retainers. Once you feel one of the valves closing, open the rebound valve slightly and see if the compression valve can be further closed. Repeat until you are certain the compression valve has shouldered out and then close the rebound adjuster.

See below for a picture of the adjuster holes. The top is rebound, the bottom is compression. See the for stock settings. In short, close both, turn the bottom (compression) adjuster 2 full turns to the left, then turn the top (rebound) left one more turn.

always be kept at 300psi
two APU13 wrenches
Shock Diagram
Baseline Setup
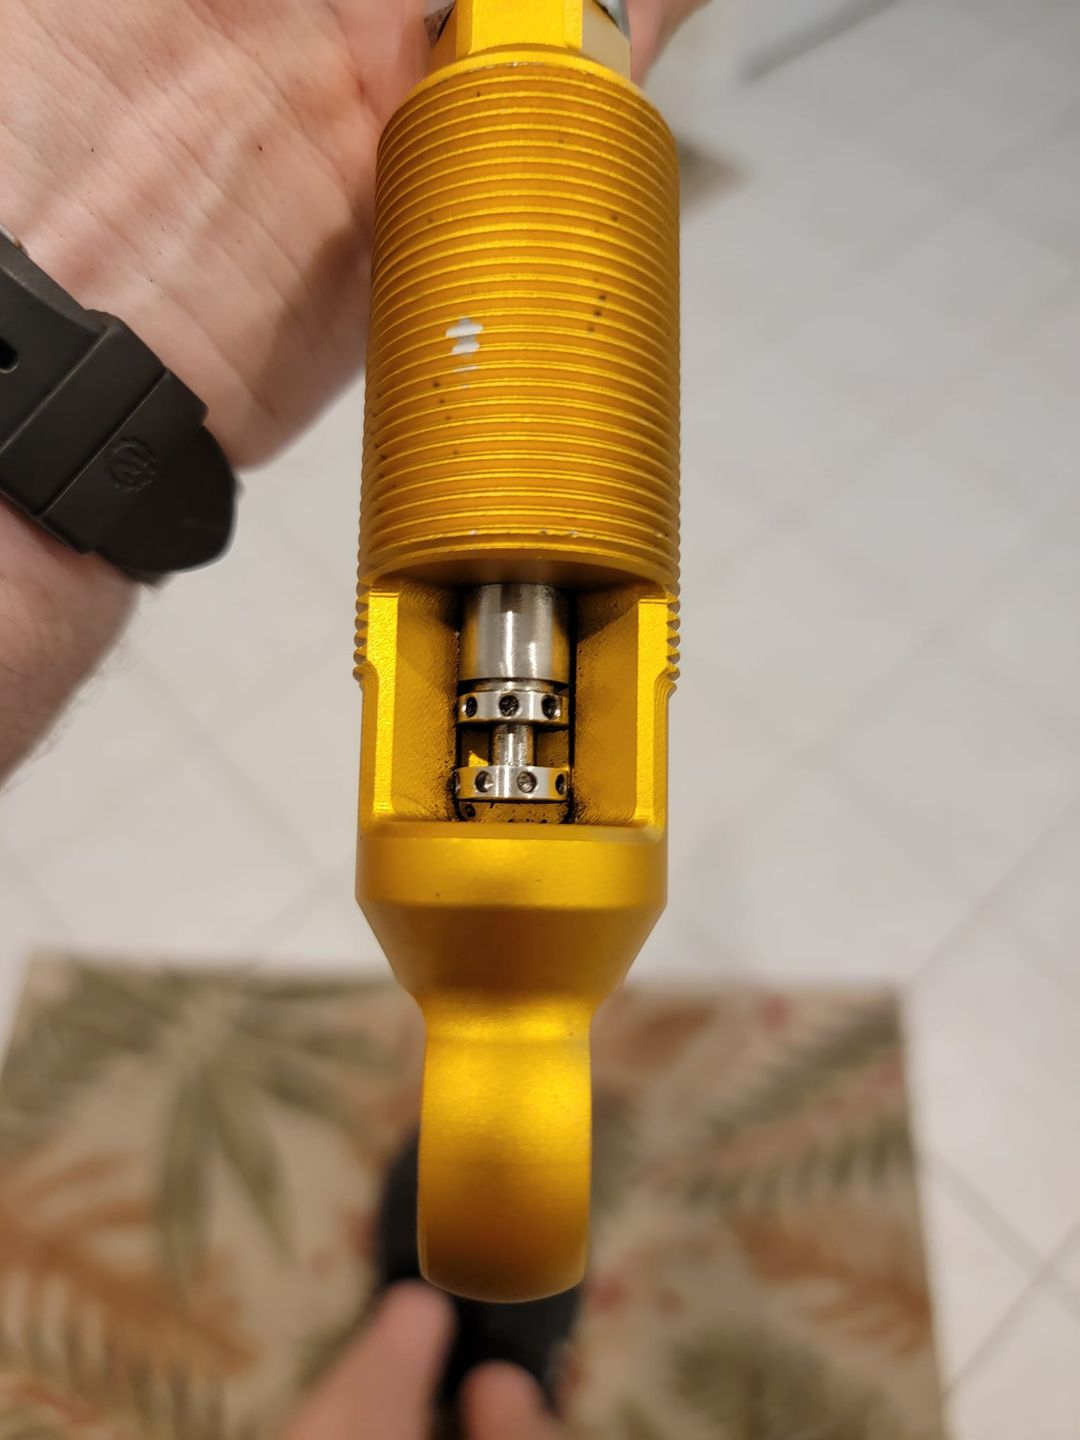
An opened shock. The top adjuster is rebound, the bottom is compression. Turn right to close, left to open.